
iOS 专用图层 三
6.3 CATransformLayer
当我们在构造复杂的3D事物的时候,如果能够组织独立元素就太方便了。比如说,你想创造一个孩子的手臂:你就需要确定哪一部分是孩子的手腕,哪一部分是孩子的前臂,哪一部分是孩子的肘,哪一部分是孩子的上臂,哪一部分是孩子的肩膀等等。
当然是允许独立地移动每个区域的啦。以肘为指点会移动前臂和手,而不是肩膀。Core Animation图层很容易就可以让你在2D环境下做出这样的层级体系下的变换,但是3D情况下就不太可能,因为所有的图层都把他的孩子都平面化到一个场景中(第五章『变换』有提到)。
CATransformLayer解决了这个问题,CATransformLayer不同于普通的CALayer,因为它不能显示它自己的内容。只有当存在了一个能作用域子图层的变换它才真正存在。CATransformLayer并不平面化它的子图层,所以它能够用于构造一个层级的3D结构,比如我的手臂示例。
用代码创建一个手臂需要相当多的代码,所以我就演示得更简单一些吧:在第五章的立方体示例,我们将通过旋转camara来解决图层平面化问题而不是像立方体示例代码中用的sublayerTransform。这是一个非常不错的技巧,但是只能作用域单个对象上,如果你的场景包含两个立方体,那我们就不能用这个技巧单独旋转他们了。
那么,就让我们来试一试CATransformLayer吧,第一个问题就来了:在第五章,我们是用多个视图来构造了我们的立方体,而不是单独的图层。我们不能在不打乱已有的视图层次的前提下在一个本身不是有寄宿图的图层中放置一个寄宿图图层。我们可以创建一个新的UIView子类寄宿在CATransformLayer(用+layerClass方法)之上。但是,为了简化案例,我们仅仅重建了一个单独的图层,而不是使用视图。这意味着我们不能像第五章一样在立方体表面显示按钮和标签,不过我们现在也用不到这个特性。
清单6.5就是代码。我们以我们在第五章使用过的相同基本逻辑放置立方体。但是并不像以前那样直接将立方面添加到容器视图的宿主图层,我们将他们放置到一个CATransformLayer中创建一个独立的立方体对象,然后将两个这样的立方体放进容器中。我们随机地给立方面染色以将他们区分开来,这样就不用靠标签或是光亮来区分他们。图6.5是运行结果。
清单6.5 用CATransformLayer装配一个3D图层体系
@interface ViewController ()


@property (nonatomic, weak) IBOutlet UIView *containerView;


@end


@implementation ViewController


- (CALayer *)faceWithTransform:(CATransform3D)transform

{

  //create cube face layer

  CALayer *face = [CALayer layer];

  face.frame = CGRectMake(-50, -50, 100, 100);


  //apply a random color

  CGFloat red = (rand() / (double)INT_MAX);

  CGFloat green = (rand() / (double)INT_MAX);

  CGFloat blue = (rand() / (double)INT_MAX);

  face.backgroundColor = [UIColor colorWithRed:red green:green blue:blue alpha:1.0].CGColor;


  //apply the transform and return

  face.transform = transform;

  return face;

}


- (CALayer *)cubeWithTransform:(CATransform3D)transform

{

  //create cube layer

  CATransformLayer *cube = [CATransformLayer layer];


  //add cube face 1

  CATransform3D ct = CATransform3DMakeTranslation(0, 0, 50);

  [cube addSublayer:[self faceWithTransform:ct]];


  //add cube face 2

  ct = CATransform3DMakeTranslation(50, 0, 0);

  ct = CATransform3DRotate(ct, M_PI_2, 0, 1, 0);

  [cube addSublayer:[self faceWithTransform:ct]];


  //add cube face 3

  ct = CATransform3DMakeTranslation(0, -50, 0);

  ct = CATransform3DRotate(ct, M_PI_2, 1, 0, 0);

  [cube addSublayer:[self faceWithTransform:ct]];


  //add cube face 4

  ct = CATransform3DMakeTranslation(0, 50, 0);

  ct = CATransform3DRotate(ct, -M_PI_2, 1, 0, 0);

  [cube addSublayer:[self faceWithTransform:ct]];


  //add cube face 5

  ct = CATransform3DMakeTranslation(-50, 0, 0);

  ct = CATransform3DRotate(ct, -M_PI_2, 0, 1, 0);

  [cube addSublayer:[self faceWithTransform:ct]];


  //add cube face 6

  ct = CATransform3DMakeTranslation(0, 0, -50);

  ct = CATransform3DRotate(ct, M_PI, 0, 1, 0);

  [cube addSublayer:[self faceWithTransform:ct]];


  //center the cube layer within the container

  CGSize containerSize = self.containerView.bounds.size;

  cube.position = CGPointMake(containerSize.width / 2.0, containerSize.height / 2.0);


  //apply the transform and return

  cube.transform = transform;

  return cube;

}


- (void)viewDidLoad

{

  [super viewDidLoad];


  //set up the perspective transform

  CATransform3D pt = CATransform3DIdentity;

  pt.m34 = -1.0 / 500.0;

  self.containerView.layer.sublayerTransform = pt;


  //set up the transform for cube 1 and add it

  CATransform3D c1t = CATransform3DIdentity;

  c1t = CATransform3DTranslate(c1t, -100, 0, 0);

  CALayer *cube1 = [self cubeWithTransform:c1t];

  [self.containerView.layer addSublayer:cube1];


  //set up the transform for cube 2 and add it

  CATransform3D c2t = CATransform3DIdentity;

  c2t = CATransform3DTranslate(c2t, 100, 0, 0);

  c2t = CATransform3DRotate(c2t, -M_PI_4, 1, 0, 0);

  c2t = CATransform3DRotate(c2t, -M_PI_4, 0, 1, 0);

  CALayer *cube2 = [self cubeWithTransform:c2t];

  [self.containerView.layer addSublayer:cube2];

}

@end
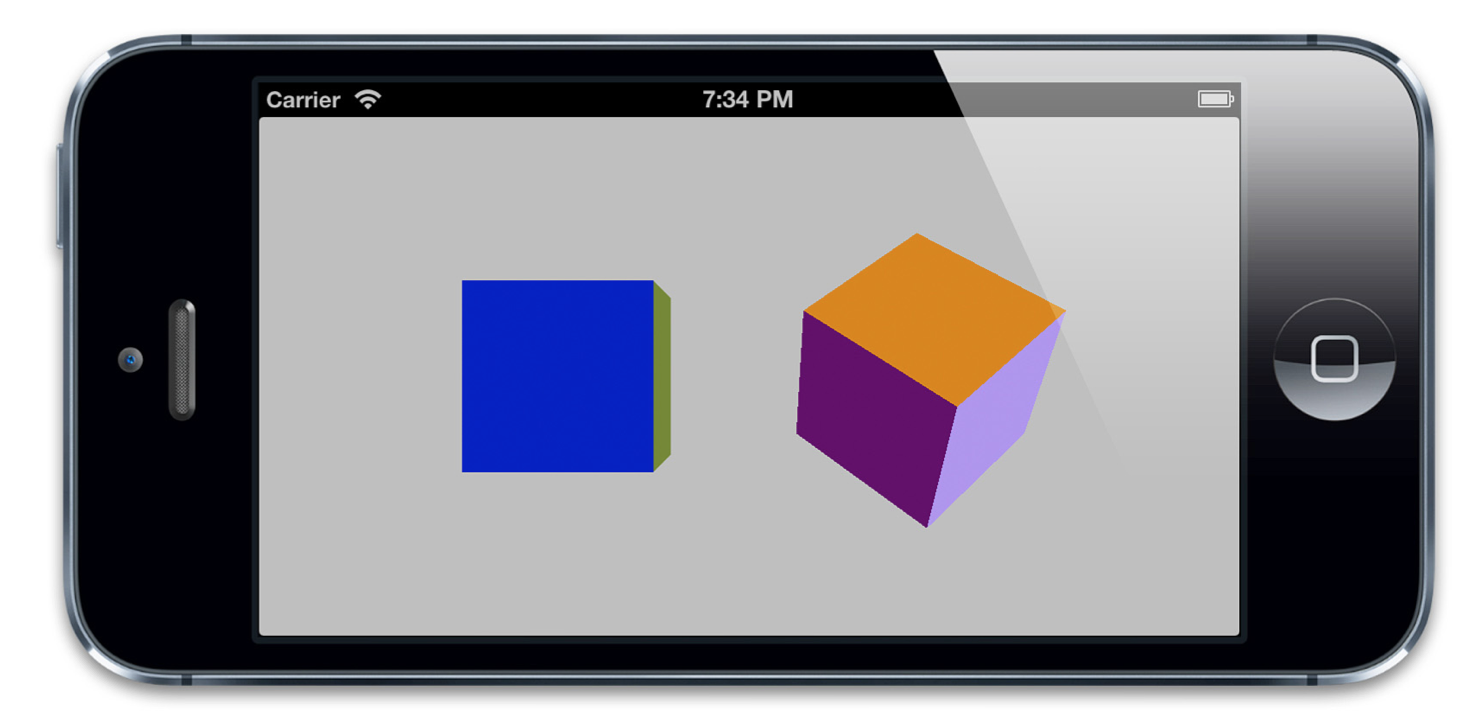
图6.5 同一视角下的俩不同变换的立方体
6.4 CAGradientLayer
CAGradientLayer是用来生成两种或更多颜色平滑渐变的。用Core Graphics复制一个CAGradientLayer并将内容绘制到一个普通图层的寄宿图也是有可能的,但是CAGradientLayer的真正好处在于绘制使用了硬件加速。
基础渐变
我们将从一个简单的红变蓝的对角线渐变开始(见清单6.6).这些渐变色彩放在一个数组中,并赋给colors属性。这个数组成员接受CGColorRef类型的值(并不是从NSObject派生而来),所以我们要用通过bridge转换以确保编译正常。
CAGradientLayer也有startPoint和endPoint属性,他们决定了渐变的方向。这两个参数是以单位坐标系进行的定义,所以左上角坐标是{0, 0},右下角坐标是{1, 1}。代码运行结果如图6.6
清单6.6 简单的两种颜色的对角线渐变
@interface ViewController ()


@property (nonatomic, weak) IBOutlet UIView *containerView;


@end


@implementation ViewController


- (void)viewDidLoad

{

  [super viewDidLoad];

  //create gradient layer and add it to our container view

  CAGradientLayer *gradientLayer = [CAGradientLayer layer];

  gradientLayer.frame = self.containerView.bounds;

  [self.containerView.layer addSublayer:gradientLayer];


  //set gradient colors

  gradientLayer.colors = @[(__bridge id)[UIColor redColor].CGColor, (__bridge id)[UIColor blueColor].CGColor];


  //set gradient start and end points

  gradientLayer.startPoint = CGPointMake(0, 0);

  gradientLayer.endPoint = CGPointMake(1, 1);

}

@end
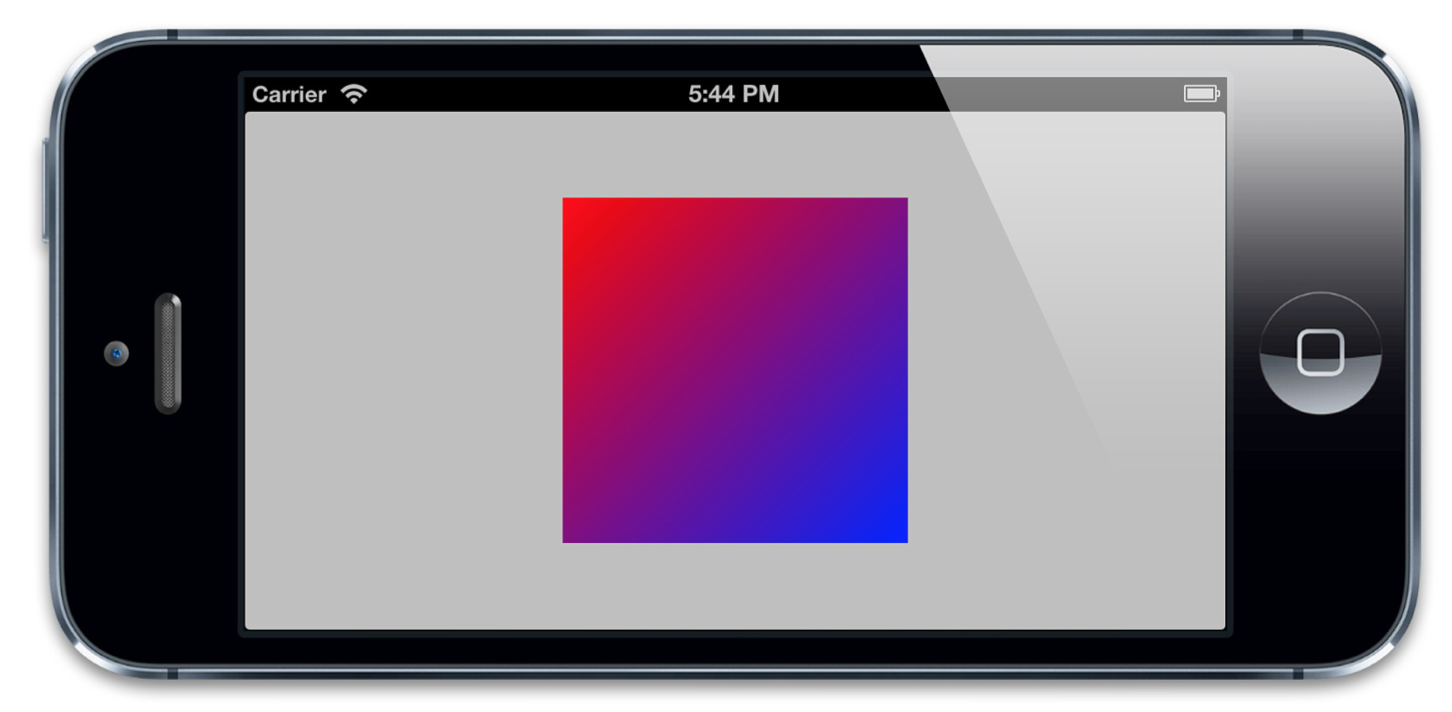
图6.6 用CAGradientLayer实现简单的两种颜色的对角线渐变
多重渐变
如果你愿意,colors属性可以包含很多颜色,所以创建一个彩虹一样的多重渐变也是很简单的。默认情况下,这些颜色在空间上均匀地被渲染,但是我们可以用locations属性来调整空间。locations属性是一个浮点数值的数组(以NSNumber包装)。这些浮点数定义了colors属性中每个不同颜色的位置,同样的,也是以单位坐标系进行标定。0.0代表着渐变的开始,1.0代表着结束。
locations数组并不是强制要求的,但是如果你给它赋值了就一定要确保locations的数组大小和colors数组大小一定要相同,否则你将会得到一个空白的渐变。
清单6.7展示了一个基于清单6.6的对角线渐变的代码改造。现在变成了从红到黄最后到绿色的渐变。locations数组指定了0.0,0.25和0.5三个数值,这样这三个渐变就有点像挤在了左上角。(如图6.7).
清单6.7 在渐变上使用locations
- (void)viewDidLoad {

  [super viewDidLoad];


  //create gradient layer and add it to our container view

  CAGradientLayer *gradientLayer = [CAGradientLayer layer];

  gradientLayer.frame = self.containerView.bounds;

  [self.containerView.layer addSublayer:gradientLayer];


  //set gradient colors

  gradientLayer.colors = @[(__bridge id)[UIColor redColor].CGColor, (__bridge id) [UIColor yellowColor].CGColor, (__bridge id)[UIColor greenColor].CGColor];


  //set locations

  gradientLayer.locations = @[@0.0, @0.25, @0.5];


  //set gradient start and end points

  gradientLayer.startPoint = CGPointMake(0, 0);

  gradientLayer.endPoint = CGPointMake(1, 1);

}
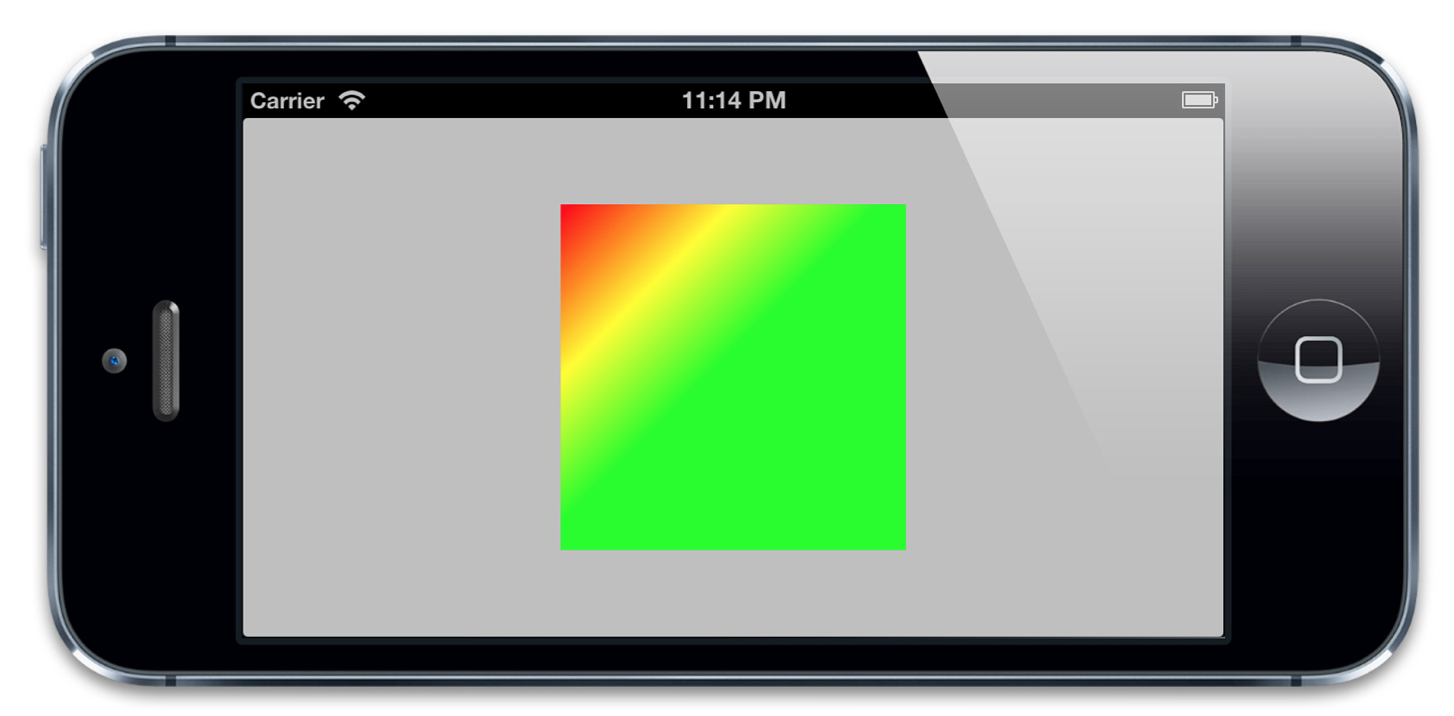
图6.7 用locations构造偏移至左上角的三色渐变
